1. Get a regular prefold and fold it in half (chose an appropriate size for your little one).
2. Find or make a pattern for a diaper. Place the straight edge on the fold. To make a pattern take a diaper (cloth or disposable) And a paper bag and trace around the diaper over your bag. Remember to stretch out the legs and back. cut it out fold it in half and cut it down the middle.
3.Trace your pattern on the folded prefold. Make sure you trace so that the part you cut is on the open side of the fold.
4. Cut along the line. no need for seam allowance.
This is what your prefold should look like unfolded.
5.Surge the edges. If you don't have a surger you can use the zig zag setting on a regular sewing machine and sew off the edge to get the same effect.
This is what the edges should look like when you are done.
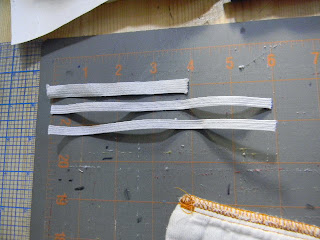
6.Now cut three pieces of elastic. For along the back 4 inches, and two for along the legs 6 inches.
7. Fold the diaper in half and make marks right under the arms of the diaper and a few inches from the rise of the diaper. (the reason you fold it in half is so you can mark the diaper on both sides in the same spots).
8.Then make your marks for your snaps/ Velcro. You want to make sure the Velcro is even. If you are doing snaps, make ten marks evenly measured from the sides about one inch away from each other.
If you are doing snaps mark two dots one inch from each other about 1/4 of an inch away from the edge.
9.Apply snaps using a hand press or table press.
10.Sew on your elastic makeing sure to use a zig zag stitch
It should look like this.
11.Then turn the diaper and make sure to stretch out the elastic as you do a zig zag stitch over the elastic down the leg of the diaper.
It should look like this when done.
12.Repeat step 10 when you get to the end of your elastic.
13. Repeat steps 10-12 On the other leg and along the back.
14. Take the two scraps from the diaper and pin the flat edges together and sew them together and surge the out side edges making it a long oval shape
It should look like this when you are done.
15. pin the top of the oval piece just below the back elastic for a girl and just below the rise of the front for a boy. (be sure you attach it to the inside of the diaper)
Using a zig zag stitch it should look like this when you are done
And there you have it for a dollar or two per diaper and some DIY, you now have a lovely fitted diaper.
Happy Sewing :)


No comments:
Post a Comment