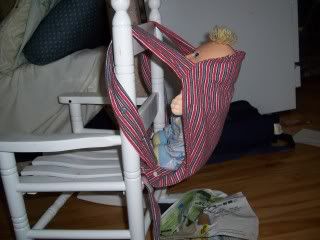
I made this one for my son when he asked to carry his one doll like I carried his baby sister. Ok, I'll make you one, I said. And naturally, when I was done, he did not want to use it anymore...
Please note that the carriers made with this tutorial are intended to carry dolls and stuffed toys, not real babies or child.
Anyways, here is how I made it, with upcycled fabric!
I took a men's flannel pj( you know, those with 2 inches hem...), so I could use the hem for the main piece:
- Cut one of the legs to make a 12in *16 in rectangle, keeping the big hem at the bottom. Then a second piece that will be 2 inches shorter ( the one with the horizontal lines), so 12*14( if you serge the hem), or add a small hem allowance on that piece only.
- Fold your pieces in half, and 2-3 inches from the top, cut a curve.
- Cut 2 : 4*20 inches ( straps) and one 3*28 inches ( waist band) from your fabric. Ignore the white thing on the picture.
- Right side together, sew or serge along the long edge of the 3 long pieces, and turn right side out. Seam allowance is 1/4 in.
- Take you 12*14 pannel, and serge/overcast/hem the straight bottom part to prevent fraying.
- Make the straps: Take the 2 20 inches tube and insert something to make them thicker, either some fleece, batting, or, like I did, some UNSTRETCHED Fold Over Elastic ( FOE). Let both ends of the FOE show at the extremities.
- Sew a straight line on the straps to hold your «batting» in place, NO stretching.
- Take your 2 panels, right side together, and pin each strap in the curve of the panels. The straps will be hidden between the panels at this time and they will have a loose end. Make sure that the extremities that will be sewn show outside for 1/2 inch, like in the picture.
- Sew the 2 long sides and the curve together, like a U. DO NOT SEW the bottom yet, you still need it to be open.
- Clip curves and turn. Topstitch the 3 sides you've just sewn. You can also reinforce the straps at this point.
- On the shorter pannel ( the one you serged or hemmed the bottom edge), pin each loose strap ends 3/4 inch on the wrong side of the bottom edge of the fabric, approximately 1/2 in from the the side seam. Make sure the straps are not twisted.
- Sew each strap in place.
- Prepare your snapping material. For each strap you will need 3 caps, 1 stud and 2 sockets.
- Put one CAP on the 3/4 inch hidden end of strap ( used as reinforcement), and one STUD or the right side of fabric. Snap. Repeat for strap # 2.
- Take you 3*28 inches tube and insert it in the big hem the the bottom of your bigger panel, and center it so each side is equal.
- Cut a 8 inch long piece of FOE or 1 inch wide elastic, insert it into the hem, pin and sew at each extremity of the hem.
- Now you can close the 2 panels together by sewing the shorter pannel to the longer one. On the picture, I sew directly on my serged edge, as close as I can to the big hem. This side is the INNER side.
- Decide if you want the waistband to fasten with a knot or with velcro closure ( easier for toddlers). If you decide on knots, just finish the raw edge and your alomsot done ( ie. see you in step 22 ) If you want velcro closure, keep reading:
- Cut your waistband shorter ( I did cut 3 inches on each side) and finish the raw edge.
- Sew a 1.5 inch HOOK velcro at the end of one waistband strap, on the inner side ( toward the wearer).
- Sew a longer LOOP velcro on the outer side of the opposite strap, closer to the main panel if you have a skinny toddler, like mine. If you have some loop tape, it is even better, as you won't have to sew your velcro again as you child grow up.
- Now, back to snaps! You will apply 2 SOCKETS at the bottom of each strap ( the socket facing the wearer, so it is also facing the stud...), spacing them approximately 3 inches. This will allow for your 2 years old as well as your 6 years old to wear it easily.


 |
| Hook is on the let side of the picture. |


Et voilà!