Showing posts with label cotton. Show all posts

Saturday, October 22, 2011

How to make... a doll carrier

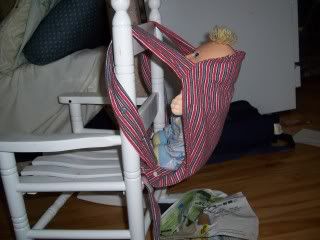
Making a doll carrier is easier than it looks.  It can make a great gift for toddlers and kids who want to do just like mommy (or daddy).  With the Holidays approaching ( I know we are still in October... ), it can make a great gift for toddlers and kids who want to do just like mommy (or daddy).

I made this one for my son when he asked to carry his one doll like I carried his baby sister.  Ok, I'll make you one, I said.  And naturally, when I was done, he did not want to use it anymore...

Please note that the carriers made with this tutorial are intended to carry dolls and stuffed toys, not real babies or child.

Anyways, here is how I made it, with upcycled fabric!

I took a men's flannel pj( you know, those with 2 inches hem...), so I could use the hem for the main piece:
  1. Cut one of the legs to make a 12in *16 in rectangle, keeping the big hem at the bottom.  Then a second piece that will be 2 inches shorter ( the one with the horizontal lines), so 12*14( if you serge the hem), or add a small hem allowance on that piece only.


  2.  Fold your pieces in half, and 2-3 inches from the top, cut a curve.
  3. Cut 2 : 4*20 inches ( straps) and one 3*28 inches ( waist band) from your fabric.  Ignore the white thing on the picture.
  4. Right side together, sew or serge along the long edge of the 3 long pieces, and turn right side out. Seam allowance is 1/4 in.
  5. Take you 12*14 pannel, and serge/overcast/hem the straight bottom part to prevent fraying.
  6. Make the straps:  Take the 2 20 inches tube and insert something to make them thicker, either some fleece, batting, or, like I did, some UNSTRETCHED Fold Over Elastic ( FOE).  Let both ends of the FOE show at the extremities.
  7. Sew a straight line on the straps to hold your «batting» in place, NO stretching.
  8. Take your 2 panels, right side together, and pin each strap  in the curve of the panels.  The straps will be hidden between the panels at this time and they will have a loose end.  Make sure that the extremities that will be sewn  show outside for 1/2 inch, like in the picture.
  9. Sew the 2 long sides and the curve together, like a U.  DO NOT SEW the bottom yet, you still need it to be open.
  10. Clip curves and turn. Topstitch the 3 sides you've just sewn.  You can also reinforce the straps at this point.
  11. On the shorter pannel ( the one you serged or hemmed the bottom edge), pin each loose strap ends 3/4 inch on the wrong side of the bottom edge of the fabric, approximately 1/2 in from the the side seam.  Make sure the straps are not twisted.  
  12. Sew each strap in place.
  13. Prepare your snapping material.  For each strap you will need 3 caps, 1 stud and 2 sockets.
  14. Put one CAP on the 3/4 inch hidden end of strap ( used as reinforcement), and one STUD or the right side of fabric. Snap.  Repeat for strap # 2.
  15. Take you 3*28 inches tube  and insert it in the big hem the the bottom of your bigger panel, and center it so each side is equal.
  16. Cut a 8 inch long piece of FOE or 1 inch wide elastic, insert it into the hem, pin and sew at each extremity of the hem.
  17. Now you can close the 2 panels together by sewing the shorter pannel to the longer one.  On the picture, I sew directly on my serged edge, as close as I can to the big hem. This side is the INNER side.
  18. Decide if you want the waistband to fasten with a knot or with velcro closure ( easier for toddlers).  If you decide on knots, just finish the raw edge and your alomsot done ( ie. see you in step 22 )  If you want velcro closure, keep reading:
  19. Cut your waistband shorter ( I did cut 3 inches on each side) and finish the raw edge.
  20. Sew a 1.5 inch HOOK velcro  at the end of one waistband strap, on the inner side ( toward the wearer).
  21. Hook is on the let side of the picture.
  22. Sew a longer LOOP velcro on the outer side of the opposite strap, closer to the main panel if you have a skinny toddler, like mine.  If you have some loop tape, it is even better, as you won't have to sew your velcro again as you child grow up.
  23. Now, back to snaps! You will apply 2 SOCKETS at the bottom of each strap ( the socket facing the wearer, so it is also facing the stud...), spacing them approximately 3 inches.  This will allow for your 2 years old as well as your 6 years old to wear it easily.
Et voilĂ !


Tuesday, January 26, 2010

Adjustable AIOs

Jenni from LilBees here, excited to tell you about my latest creation!

My primary frustration with newborn size diapers is that the baby grows out of them so fast. But small diapers can be bulky on a newborn, and may end up leaking since a newborn's legs are usually quite skinny. I don't like snaps in the crotch (who wants one more thing there, right?). Fitted diapers are often made adjustable with a fold-down front for their extra row of snaps, but an AIO (all-in-one) diaper cannot have that type of fold-down or it would leak.
So what's a mama to do?!
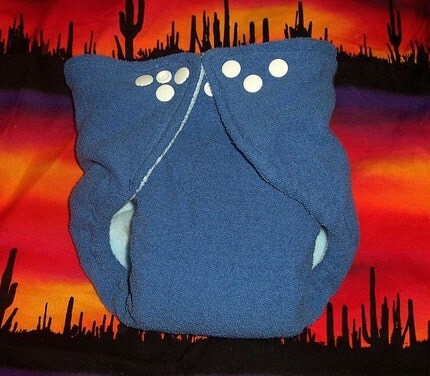
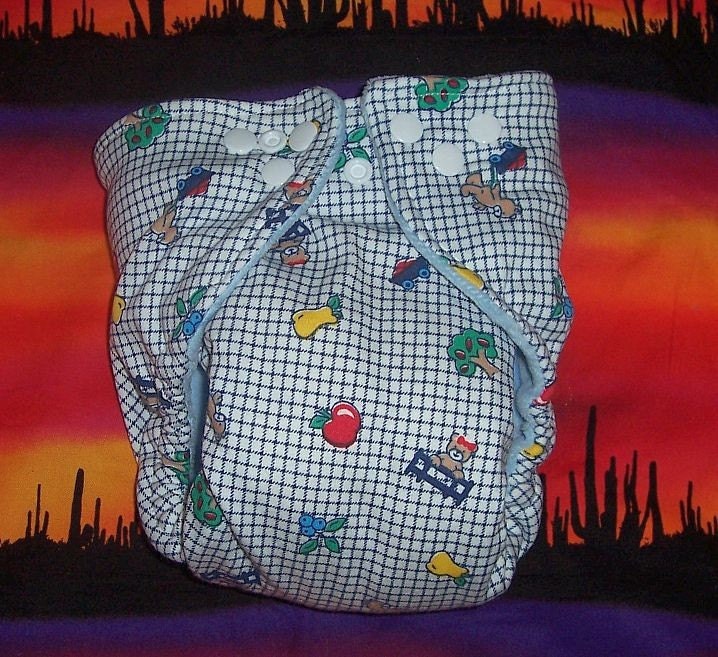
This diaper is the solution I came up with for my own son: A small AIO diaper with an extra row of snaps so that it can be done up tighter (and with a shorter rise) during those first days or weeks. The inside layer is soft (either velour or flannel) so it will not irritate that tender belly button even though it will cover it.
This photo shows my son wearing this design at about 8lbs (dark blue) and 13 lbs (light blue).

I've just stocked my first of these at LilBees, and plan to stock more in the coming couple of weeks.

Saturday, August 22, 2009

Getting Ready Chiquitos Diapers @ Erika's Chiquis


With summer sadly(very sadly)coming to a close and kids going back to school , I've been trying to start getting more diapers up.
I've bought some lovely flannel and knit fabrics. I have some of the cutest prints coming in September.
I hope everyone continues to enjoy the sunshine.
Erika
http://www.erikaschiquis.blogspot.com/ info on diapering on the right side

Saturday, July 18, 2009

Having Fun with Los Chiquitos Diapers@Erika's Chiquis

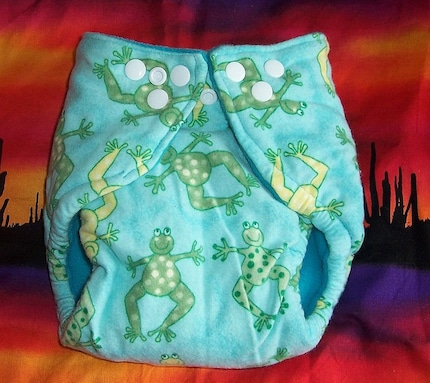
Brought back a few of my Stretch Terry Cloth. Nice , soft and absorbant.
http://www.etsy.com/view_listing.php?listing_id=24038367

The always popular Knit with its soft and stretchy
qualities
.

http://www.etsy.com/view_listing.php?listing_id=24078728

The Oldie but Goodie Flannel diapers with the endless amount of prints and always being cuddly soft.
http://www.etsy.com/view_listing.php?listing_id=21270100

You can always see more diapers and other items @
http://www.erikaschiquis.etsy.com/
http://www.loschiquitosdiapers.com/

more info about cloth diapers in general in my blog(click on links to the bottom right)
http://www.erikaschiquis.blogspot.com/

Wednesday, April 1, 2009

NEW! Snappy Nappies now available at La Petite Krott Creations


After putting a lot of my time and effort into knitting Wool Soakers/Diaper Covers. I have decided to concentrate more on cloth diapers. I am happy to introduce a new design for La Petite Krott Creations : Snappy Nappies!
These are still made with my shop focus in mind with 100% cotton. I was getting tired of separating diapers from each other after they became stuck together in the wash, even with laundry tabs. So I chose to make these with snap closure for a more convenient diaper. These are a One Size Fits Most diaper with adjustable snaps, which allow this diaper to fit from newborn to toddler size. I have 6 fabric patterns to choose from, with more coming soon! Please check out my shop for more information and pictures.

Tuesday, August 19, 2008

Girls Day Out

I had a great little mini-vacation and am now back to work! I have had some fun these past few weeks sewing things just for little girls. I stocked some cute fitted cloth diapers, a pul/fleece diaper cover, and a swingback dress and diaper set on both my Etsy and my HyenaCart.


Etsy
Buy Handmade
deebleDdo

Most of these diapers can also have a dress or appliqued tee, or an embroidered cover made to match the diaper fabric...just ask because I am having a good time digitizing designs for embroidery. :)

3d is open again for custom orders for embroidery and cloth diapering items, and as always, I am happy to have you send your own diapers or garments to me to be embroidered. You can visit the 3d~DeebleDdo blog to view the design gallery and get a peek at what I've done recently.

Thanks for your patronage of our Etsy Cloth Diapering Team!

Wednesday, April 9, 2008

Bones & Roses & Pirate Booty!

I am excited about our upcoming promotion and decided to add a few new cloth diapers to my Etsy for the occasion! Skulls and Pirates seem to be a hot item these days and I just fell in love with these four prints. I was able to do some fun embroidered covers for them as well and the sets turned out great!


For the Etsy Cloth Diaper Street Team Promotion, I will be offering a free matching cloth wipes container with the purchase of one of these 4 diapers. The zippered fabric container will have a matching fabric outer and an inner of polyurethane laminate (PUL) to keep your moist wipes ready for use. :)

Thursday, March 6, 2008

Let's Try out The Label Thing ...


I've made some cute little Kimono Shoes ...
they will SO look sweet with cloth diapers and
wool soakers and
onesies!

You can see them for yourself at my Etsy ... Betriska.com
Related Posts Plugin for WordPress, Blogger...