
Showing posts with label etsy cloth diaper team. Show all posts
Showing posts with label etsy cloth diaper team. Show all posts
Thursday, November 22, 2012
Etsy Cloth Diaper Team Holiday Giveaway
This amazing giveaway features many of the amazing shops on the Etsy Cloth Diaper Team. Check in tomorrow for all the details!


Friday, November 16, 2012
Cloth Diaper Info—Caring For Your Wool Diaper Covers
 |
| A Batch of Covers Ready to Wash |
Whatever style wool cover you like best, if you want it to
last and work well, it needs to be properly cared for. Most 100% wool covers
will need to be hand washed and laid flat to dry. They will also need to be
lanolized in order to properly work as a diaper cover. Depending on the type of
wool, you may also need to do some cosmetic maintenance (like pulling off fuzzy
pills). If you have a hand knit cover you will want to be very careful when
using with pins or Snappies that the cover doesn’t get snagged when quickly
pulling on or off. Tears can also occur in repurposed wool covers if the wool
is soft and not tightly felted.
When should you wash your wool cover?
There are two ways to know, the smell test and the moisture
test. Firstly, does the cover smell after a proper airing out? If it does, it
is time to wash it. Is it leaking? If so, it needs to be lanolized. If it does
not smell, you could choose a lanolin spray to lanolize in between washings.
Otherwise, lanolize it as you are washing.

 Dissolve a small amount of lanolin (about a 1/4" bead per soaker,
or more for larger sizes or longies) in a cup with some hot water and wool wash
or a baby wash of your choice. You may also choose to use a lanolin enriched
wool wash.
 If you cover has poopy residue on it (which is best wiped off
immediately with a damp cloth) gently clean it in warm water and maybe some lanolin soap without rubbing or
agitating it too much to prevent felting.
 Fill a sink or tub with warm water and
submerge your wool cover in the water. Pour your soap and lanolin mixture over
the cover and gently stir the water with your hand to disperse the lanolin.
Turn your cover in the water to get it coated. Let the cover soak for 15
minutes. Drain the water out of the sink. Gently rinse the cover in warm water.

(NOTE: If your cover is new and made from hand-dyed wool
check the water for bleeding of color. If you see a lot of color in the water,
repeat the washing and rinsing until the water is fairly clear. If the cover
becomes saturated during use and the wool has excess color, the color may bleed
onto diapers, clothing, or bedding.) Gently press the water out of the cover
without squeezing too much or twisting.

 Then lay the cover on a clean dry towel and roll the towel
up to squeeze out the extra water. Then lay the cover out to dry on another
towel or over a drying rack. Do not hang heavier covers like longies over a single bar
to dry because the weight of the damp wool will cause the cover to stretch. If
you want the cover to dry more quickly, lay it outside in the shade on warm day
or place it in front of a fan.

 If you have hand-knit longies or covers embellished with
ruffles, this is the time to do what is called blocking. While the cover is
damp on the towel, take the time to lay it out nicely and arrange any ruffles.
They will dry in the shape that you leave them. For ruffles, use your fingers
kind of like you are fluting a pie crust to puff up bell ruffles or to evenly
shape more free-flowing ruffles.

 It’s hard to know before using a wool cover, but some wool
is more likely to get pills and fuzzies during wear. A few can be picked off by
hand, but if there are a lot, it will be tedious. I like to use a sweater
shaver to de-pill my covers. This can be done before or after washing and
drying. A sweater shaver costs around $10, or you could also use a sweater
stone as seen here. I prefer the shaver (even though it requires batteries)
because the stone tends to drag across some types of wool and pull. Lay the
cover flat and gently rub the shaver over the fuzzy areas in a circular motion.
Don’t go too fast, just let the shaver do its job, and when you are finished
your wool cover will look really revived.

 It doesn’t take too much effort to keep your wool looking
nice and you can feel good about choosing a natural fiber with so many naturally good
qualities!

Saturday, November 3, 2012
DIY—Cloth Diaper Liners
What are cloth diaper
liners? A cloth diaper liner is simply a thin material placed into the
diaper to either protect the diaper from build-up that may result from diaper
rash creams or to catch flushable solids for easier disposal.
Despite the many wonderful attributes of cloth diapers, some
babies will still get diaper rash. My own child has very sensitive skin and
there are times when we have to resort to non-cloth diaper safe creams or
salves. If this is the case for you, or if you just want to avoid having to
rinse your entire diaper after a stinky, diaper liners are a good solution.
There are many options to buy, both flushable and reusable.
The benefits of a flushable are obvious, you flush it and its gone, no more
mess. But you do have to keep buying them, and you will probably have to try
many brands before you find one you like. Cloth liners also come in a variety
of materials to choose from.
Do you want to see if diaper liners will make your life easier?
Just make some yourself. All you need is some polyester fleece and a pair of
scissors—no sewing!
Start with some thinner fleece so as not to add too much
bulk to your diaper. What I am using today is just some fabric store fleece I
bought out of the remnants bin. You could also cut up a pair of old fleece
pajama pants if you had some lying around.

 You will begin by measuring the rise and width of your
diapers.

 Then the easiest thing to do is to cut a rectangle that size
(mine was 13 X 5”). Cutting rectangles is also the most efficient use of your
fabric.

If you want even better coverage than what a rectangle gives,
mark on your rectangle with pins where the diaper gets wider on each end and
draw a pattern with contoured ends.
 Fold the pattern in half to cut it out if you want a nice symmetrical
shape.
 Then simply cut your shape out of your fleece and lay it in
the diaper to use as a liner.
REMEMBER: Always wash liners that have been used with diaper
balm separately from your diapers. Even having them in the same wash load will
cause repelling build-up on your diapers. I found this out by accident! So you
will probably want a small wetbag or bin for your dirty liners.
Friday, November 2, 2012
Out of Diapers? Try a Receiving Blanket!
When I started to use cloth I heard a lot about being able to use a
receiving blanket as a diaper. I had never tried this and soon forgot
all about it. Well for the first time ever Little Pumpkin ran out of
diapers. I had put them to wash but before bed I had forgotten to put
them to dry, so while diapers were drying I had nothing to put LP in.
Then I remembered the receiving blankets! I looked up how to fold a flat
diaper and gave it a try, and I have to say using the receiving blanket
as a diaper is great! I may try some flat diapers now.


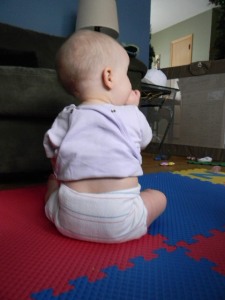
I hope that your find this helpful! Happy cloth diapering :)


I decided to share with you how to use a receiving blanket as a diaper.
I hope that your find this helpful! Happy cloth diapering :)
Saturday, September 15, 2012
DIY—Delicious Healthier Chocolate Milk

So we ran out of the chocolate syrup we would normally use
and I was scouring the grocery store shelves for an acceptable whole foods
alternative. I found one organic brand, but I wasn’t willing to pay the price
when it still contained ingredients I wasn’t crazy about. A few weeks later I
saw a blog post about making chocolate milk with cocoa powder. Why hadn’t I
thought of that? Cocoa powder is a staple in my pantry, so it’s nothing extra
to buy. I use it to make hot chocolate, so why not chocolate milk? I tried their method of shaking the raw
cocoa powder up with the milk in a sealed mason jar, and it was okay. I could
never get the cocoa powder to completely mix and there were always little
bubbles of raw cocoa floating around that don’t taste great and look
unappetizing, not to mention the hideous milk mustache they gave my toddler. It
also had a tendency to separate quickly.
So here is my method:

I like to use an old Tupperware salad dressing shaker that
has a spinney thing that fits inside the lid. It does a great job of getting a
good mix and the added benefit of a small opening to pour the milk out of. This
helps if you want to add a few ice cubes for ice cold milk, but want to strain
them out after mixing.
 I put the cocoa powder and sugar in the bottom of the dressing
container. Then I add just enough hot
water to dissolve the cocoa powder and sugar. A VERY small amount will do, just enough to make a paste. Make
sure the cocoa is completely dissolved in the water. Use a mini-whisk to mix
this if you have one.
 |
| Before Mixing |
 |
| After Mixing |
Add your milk. Put the spinner and the top on the shaker
and shake away! You will end up with a delicious chocolate milk, maybe even a
little frothy if you shake hard enough. Let your kids do the shaking—just make
sure the lid is on tight!
To Make 1 ½ cups
Chocolate Milk (enough to fill my toddler’s cup and a small drink for me):
1-2 heaping teaspoons cocoa powder (1tsp dark cocoa, 2 for regular, or to taste)
3 teaspoons unrefined sugar (maple syrup or honey are good
too)
1 ½ cups milk
Optional: add a dash
of vanilla or other flavor extract, or maybe even a dash of cinnamon
Another thing my boys loved was “pink milk”. They mostly got
it at grandparents’ houses. It was the only way I could get my youngest to
drink milk after he weaned from nursing. I gradually decreased the amount of
pink stuff until he was drinking straight milk—now he likes milk any way I give
it to him. The other day I thought it might be a treat to give him “pink milk”
so I used my stick blender to puree some fresh strawberries in his milk. It was
a little tart, but he drank it. It will depend on the strawberries of course,
but you could add a little unrefined sweetener to taste. The stick blender
makes it really frothy and you can throw in other things like flax oil and hide
it pretty well. Just some ideas…I hope I’ve inspired you to create a yummy
drink for yourself. I’m tempted to go and make myself one now, but I’ve already
had a smoothie this afternoon!
NOTE: Remember
not to feed strawberries to little ones until you are aware of allergies!
Monday, September 10, 2012
Meet the Team - Laila of TipuTap
Today we're chatting with Laila from TipuTap, so settle down in your favorite chair with something yummy to drink and join us!

What's your name and where do you live?

My name is Laila and I live in Latvia, it is the small but very nice country in the Northern Europe. There are only about 2 millions people in my country. I live in Riga, it is capital of my country. It is nice and very old city. In my country people live very touches with nature. I know many countries it is lost now, but in my country many peoples goes pick up Christmas tree in the forest not in the shop :). In autumn we goes pick up berries and mushrooms by self ( I like this process, it is real meditation), many of us have gardens. And in the same time we have computers, moderns flats and all things what is in other countries.
Where did you get the name for your shop?
How long have you been in business?
How did you get the idea for your products/business?
What have you found most challenging about running your own business?

Why do you like selling on Etsy?
What is your favorite thing to make at the moment?
What is the kind of diaper you like the best at home?
 Now I use potty training pants with PUL outer and changeable inserts. But before I start with fitted diapers and PUL cover, after I use the similar all in two systems, one was with simple PUL covers, one was with PUL cover with microfleece lining, also I have large amount of pocket diapers and I tries also fully natural system from wool cover and cotton inserts. All my diaper was made by me, and before I offer them to my customers I tried them to my daughter. My favorite system stays all in two system with simple PUL cover, like Flip diapers.
What is your favorite cloth diapering memory?
I made two full completes from 20 pieces fitted diapers for peoples by charity. In our popular social site this people ask for help with other goods, I also offer to make them cloth diapers and save their money (before they use disposable diapers) and they was very glad and start cloth diapering.
Who or what is your inspiration?
Do you have anything new coming up, such as new products or promotions?
 I hope I can start new line - prefold diapers and wool soakers, longgies and covers from upcycled materials. It is very good idea what I got on etsy - to give new life for old and used things.
Is there anything else you'd like to share?
Where can we find your products?
Where did you get the name for your shop?
In my language people says Tipu Tap when baby start to go and do their first steps. This words is easy pronounced for little children in my language.
How long have you been in business?
My business I started one year ago, when my little doughtier was 4 months. In additional I have also older doughtier, she is 10 years old. My etsy shop I opened in this year April. 1 . I hope this date helps me :) but it is only toss-up.
How did you get the idea for your products/business?
I left many hours to my computer and find, read and see so much models if to understand what is better for me. Usually this is USA sites, where I found many information. There is some sites : www.Zany-Zebra.com, www.diaperjungle.com . Very nice site : http://www.thenappynetwork.org.nz/. In Europe we have a more little information about cloth diapers. Europe is old and conservative :) and she do not love changes so fast :) . Also I delve many diapers of industrial producers. My favorites is Gro Via and Flip by Cottonbabies system, from organic producers I like Disana tie diapers.

Please share what is unique about your products.
Please share what is unique about your products.
My product is different from others similar products as I do not use kam snaps. Reason is very simple, I do not have snap press only snap pliers. My one size diapers have size adjustment system with buttonhole elastic and small buttons ( It is like Funzz Bunz diapers system, but my is a little better :) I think). Also all my inserts have stay dray layer and I recommend to use them not only in pocket but also as all in two system. Also I offer personalized diapers where customer can order diapers with their babies name or other text. And I have much ideas for future. I hope I will have enough time for realize them. And yet I offer preemies size all in one diapers and mini uni size diaper - it means newborn diaper with buttonhole adjustment system for the best fit.
Also I offer potty training pants with changeable inserts, this system is very economical and easy to use. It is vary important in my country, where after economical crises life level decrease.
What are your most popular products, and why are they so appealing?
Also I offer potty training pants with changeable inserts, this system is very economical and easy to use. It is vary important in my country, where after economical crises life level decrease.
What are your most popular products, and why are they so appealing?
At the moment I can not says what is the most popular product, because my business is in start. Peoples very like my diapers with hidden PUL, where I hide PUL under cotton fabric in the nice prints. This cotton fabrics are made in Latvia and is unique so as you do not find them in another places.
What have you found most challenging about running your own business?
You can be the master himself, you can to response fully by self and you need not to deducted to any , Oh, maybe sometimes you need deducted to tax inspection:). And it is very interesting, I make nice things, I meet so much and so different peoples.
Has anything been easier than you expected? More difficult?
I would like if the process in all grows faster, but it is real hard to join full time job ( I have), family and this business. I would like to spend more time with my daughters, but now I can not to be with them as I want. I hope my business grows up and I can left my full time job.
More difficult? I do not know, maybe to write in English, after I start my business my English is more better and it is not so difficult as I think before.
Why do you like selling on Etsy?
First I like to meet many peoples from many countries around of the world, now I know the world is so small. There is the place where I can sell my products outside my country and I can find more customers as in my country ( only 2 millions as you see before).
How long have you been sewing? Do you knit or crochet also?
How long have you been sewing? Do you knit or crochet also?
In my country each women learned to crafts very early, about 7-8 years. All women can knit and crocheting, sewing is a little bit less, because there is needed sewing machine. My mother teaches me about in 8 years. I start with crocheting and sewing, after I learned to knit. I real like to knit but I have not time for this. I like to feel natural yarns in my arms. I always use natural yarns, my favorite is Latvian sheep wool, it is no so soft but it is real warm and very suitable for our cold climate.
What is your favorite thing to make at the moment?
I sew cloth diapers :), is all my free time.
Why is cloth diapering important to you?
First I like the process, I like to use them in my daughter, I tried so much designs. I like wash them, exeperments with laundry detergents, with stripping. I like sew them. My motto is - cloth diapers it is art, it is real art , I like make this art and give them to others. In additional it is important for each of us - left waste after self so little as it is possible.
What is the kind of diaper you like the best at home?
Now I use potty training pants with PUL outer and changeable inserts. But before I start with fitted diapers and PUL cover, after I use the similar all in two systems, one was with simple PUL covers, one was with PUL cover with microfleece lining, also I have large amount of pocket diapers and I tries also fully natural system from wool cover and cotton inserts. All my diaper was made by me, and before I offer them to my customers I tried them to my daughter. My favorite system stays all in two system with simple PUL cover, like Flip diapers. What is your favorite cloth diapering memory?
I made two full completes from 20 pieces fitted diapers for peoples by charity. In our popular social site this people ask for help with other goods, I also offer to make them cloth diapers and save their money (before they use disposable diapers) and they was very glad and start cloth diapering.
Who or what is your inspiration?
My mind :) and my customers.
Do you have anything new coming up, such as new products or promotions?
I hope I can start new line - prefold diapers and wool soakers, longgies and covers from upcycled materials. It is very good idea what I got on etsy - to give new life for old and used things. Is there anything else you'd like to share?
Happy cloth diapering!
Where can we find your products?
Saturday, September 8, 2012
DIY—Cloth
Wipes on the Cheap
Okay, so you’ve made the leap to cloth diapers and you are
loving it, or at least you are delighting in the cost savings. But are you
still hanging on to those disposable wipes? They add up too you know, and it’s
SOOO easy to kick the habit! So many things can be turned into cloth wipes with
very little effort.
 |
| Simple Zig-Zagged edge... |
 |
| Two layers of flannel... |
Do you (or your parents) have any of those transparently
thin bath towels still lurking in the linen closet? They are old, but soft, and
could still be put to great use. Simply decide what size you want your wipes
and cut the towels into squares. Cut off any thick edges or decorative
stitching that may be scratchy on baby’s bottom. The edges will fray because of
the fabric, so you will need to run a zig-zag stitch around them or serge the
edges. Wah-Lah, a set of cloth wipes!
Do you have any holey cotton velour leisure suits lying around? Cotton velour makes a lovely cloth wipe. Simply cut the cloth into squares or rectangles the size you want and layer them together or with another material to keep the edges from rolling. Finish them the same as described above.
Check out these velour wipes from Etsy Cloth Diaper Team members: Northern Mom and Bundles of Joy and Sweet Bobbins!
What about old flannel sheets or pillowcases? Simply cut
into squares and use two layers per wipe and finish as suggested.
Here are some flannel wipes from Etsy Cloth Diaper Team members: Rumpeez and CheekyBunz and Just2CuteAccessories and Lil Stuff and TheCraftEGalDiapers !
 |
| Flannel and t-shirt wipes. |
Everyone has some soft, old, stained, cotton t-shirts lying
around. Simply cut into squares and use. These don’t even need to be finished
off in most cases! Just don’t use
stiff crusty t-shirts with painted or vinyl decorations on them because they
won’t be soft for baby.
Basically, anything soft and cotton can be turned into cloth
wipes. Because wipes are small you can cut around holes or other issues and
still repurpose your item for good! Just don’t get carried away and cut up
something your loved ones will miss!!
If you really just want cute wipes, wait until the fabric
store runs their flannel on sale and buy a few yards of flannel that
coordinates with your baby’s décor.
“What if I don’t even know how to turn on a sewing machine?”
Well, cut some out and take them to someone who does (maybe you can do
something for them while they stitch your wipes up), or at least buy mama-made
wipes!
“Great, you say, now how do I use them?”
However you want! Some people
like to create a wipes solution and keep the wipes soaking in the solution.
While this is handy for immediate use, if the wipes aren’t used in a timely
manner, the solution can go bad and the wipes turn moldy. Others keep a
container of solution and dunk the wipes individually as needed. Many like to
keep solution in a squirt or spray bottle and dampen the wipes that way. You
may need to experiment and see what works for your family. I prefer a stack of dry
wipes next to a container of solution. When I know I’m changing a dirty, I dunk
and squeeze a couple before getting started so I don’t have to stick my hands
back in the solution and contaminate it.
See some ECDT member wipes solution bits: Rumpeez or WeeEssentials. Some recipes to make your own solutions from Zany Zebra.
“Should I use them for going out as well?” Why not? They go
right in the wet bag (Check these out from ECDT) with
the dirties, so there’s nothing to throw away. There are many ways to store
pre-moistened wipes in your diaper bag. A common Ziplock will do, a travel
wipes bag (from ECDT), or (as my friend
does) a mason jar.
“What about the poopy? Do the wipes need to be rinsed?” As I
said before, everyone has their own methods. I like to get most of it with the
diaper since it will likely be rinsed anyway, and then I don’t worry about the
little bit that gets on the wipes, they just go in the dry pail with the dirty
diapers.
The point is, you do what works for you, but cloth wipes are
a win-win for everyone—especially considering you can likely make them for free
with stuff you have around the house. Maybe you’re not a pack-rat, and maybe you
really don’t have any of these unused items lying about. Just hit a few yard
sales or thrift stores, or better yet, plunder the closets or your friends and
relatives. They’ll probably be happy for you to relieve them of some of your
clutter!
FYI—This same method can be used for repurposing soft cotton cast-offs into handkerchiefs (a
big money saver during cold/flu season).
Wednesday, August 1, 2012
New August Treasury Geometric!
'Geometry AYONE???' by 3monkeysclothdiapers
Etsy Cloth Diaper Teams geometric items.
 Snap or Velcro Geometric One... $22.00 |  Pure Bebe Super Stars - Clot... $5.75 |
 Winged Bamboo Prefold - Size... $11.00 |  Cloth Diaper Small (Big Newb... $21.00 |
 Party Monsters- One Size(OS) $15.00 |  Cupcake Dots Road Trip Wetba... $32.00 |
 ONE SIZE Pocket Diaper, PUL,... $20.00 |  Large Bamboo Fitted Cloth Di... $25.95 |
 X-Large Hanging Wet Bag for ... $26.00 |  Snap or Velcro Modern Floral... $22.00 |
 Circles on green $8.00 |  Wet bag Green Polka Dot for ... $15.50 |
 Interlocking Circle Anti-pil... $7.50 |  Large Jar of Goat's Milk... $12.00 |
 Upcycled Wool Soaker Cover D... $20.00 |  Geometry Class Fleece Diape... $7.00 |
Treasury tool supported by the dog house
Subscribe to:
Posts (Atom)
